
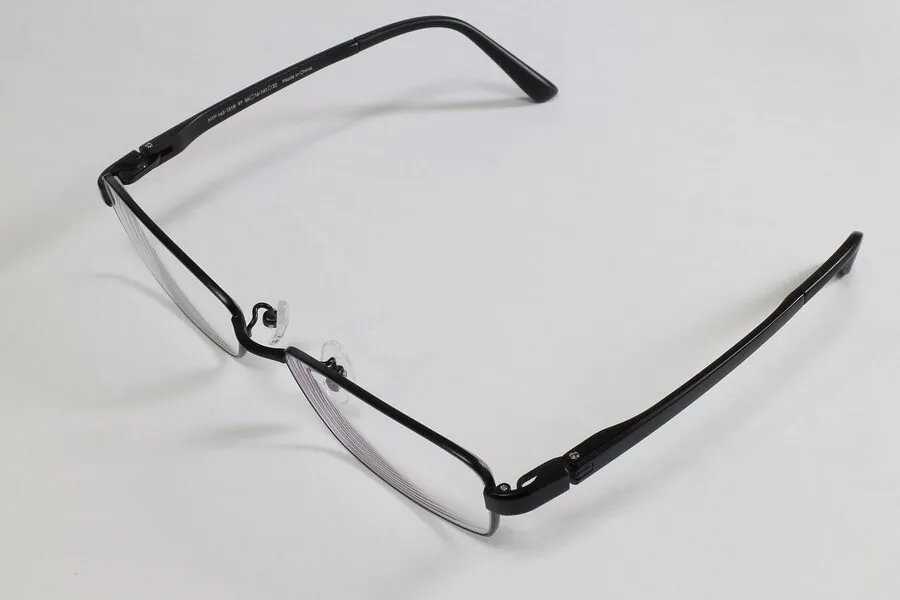
1. Clean lenses, open temples
Fingerprints and dust that the eye ignores fill the picture at this scale. Wash or spray the lenses, dry them with a microfibre cloth, and from then on hold the frame by the bridge and the temple tips. Look at the nose pads and at the groove where each lens meets its rim, which is where dirt gathers on a worn pair.
Open both temples until the hinges stop. A frame resting on its temple tips and lower rims presents its front squarely and its sides in perspective. Where a loose hinge lets a temple swing inward, a small ball of removable putty under the tip, out of sight behind the frame, holds it open. Demo stickers come off the lenses; on an unworn pair sold with them, one photo with the stickers is enough.
2. Deciding what the lenses reflect
A lens shows what stands opposite it. Clear lenses with an anti-reflective coating carry a faint green or purple copy of the window; dark and mirrored lenses carry the entire room. The remedy is to choose their view. Set the glasses on a table with the window to one side, and stand a large sheet of white card in front of them, just outside the picture. The lenses now return an even, pale surface.
The phone is the last reflection to remove. Raise it a little and angle it down, or shift it sideways and turn the frame by a few degrees, and watch the dark rectangle drift to the rim and off the glass. Some photographers cut a hole for the camera in a sheet of white paper and shoot through it. Any reflection that stays should be shapeless: a soft band of light reads as glass, while a window with a figure in it reads as a mistake.
3. Front view and three-quarter view
For the front view, bring the phone down to the height of the bridge and hold it parallel to the frame front. Both lenses should appear the same size, with the top rims level; if one lens looks larger, the phone has drifted to that side. This photo establishes the lens shape, the bridge and the overall width.
The three-quarter view turns the frame roughly a third of the way to one side, so that the near temple runs back into the picture and the hinge and the end piece come into view. It is the most informative single photo of a pair of glasses and a sensible first image. Step back and zoom slightly for both views, because a phone held close swells the nearer lens and bends the brow line.
4. Side view, hinges and the folded pair
A true side view looks along the frame front, which shrinks to a thin edge while one temple fills the picture from hinge to tip. It records the thickness of the temple, the bend of the tip behind the ear, the tilt of the front and any metal core visible through acetate. Photograph the side that carries the logo, and the other side as well if the two differ.
Then fold the glasses. Seen from above, the folded pair shows how flat it closes and how the temples cross, which says something about hinge alignment on a used frame. A close-up of each hinge with its screws in focus, and another of the nose pads and their arms, completes the small parts.
5. Lens tint, gradient and mirror coating
Lens colour is hard to judge over a dark table. Prop the pair so that a white surface sits behind the lenses, and the tint appears as it does when light passes through it: grey, brown, green, rose, or a gradient fading downward from the top rim. Take this photo in daylight and leave the white balance alone, because an automatic warm-up turns grey lenses brown.
A mirror coating does not show through white card. Let a mirrored lens reflect a plain bright surface so the colour of the coating is visible, and add one photo at a slight angle where that colour shifts. Photochromic lenses, which darken in daylight, can be shown in two photos, indoors and after a short time outside. For optical frames, state in the listing whether the lenses are demo lenses or ground to a prescription; a photo cannot tell the buyer that.
6. The print inside the temples, and the case
The inner sides of the temples carry the identity of the frame: usually the name on one, and on the other a model code, a colour code and the measurements of lens width, bridge width and temple length. Lay the open pair face down on a cloth so the inner temples face up, bring light in from the side, and take one photo of each temple with every character readable. A mark etched in a lens corner or moulded into a nose pad deserves the same care.
On a used pair, add close-ups of lens scratches, found by tilting the lens until the light rakes across it, of whitened acetate at the temple tips, and of chipped paint or a bent pad arm. Finish with the case, open, with the glasses beside it and the cloth, card or box that comes with them. Keep every file as the phone saved it; a screenshot of a temple code is rarely legible.
Checklist
- Lenses cleaned, temples open to the stop
- White card facing the lenses, phone out of the reflection
- Front view at bridge height, then a three-quarter view
- Side view, folded view and hinge close-ups
- Lens tint against white, in daylight
- Inner temple print, lens scratches and the case
Updated 12 October 2026